
It's an easy technique and won't require lots of cord.

~20,5cm (~8 in.) bracelet
~140cm (~4.6 ft.) neon green
~140cm (~4.6 ft.) kelly green
To prevent the bracelet from shrinking, I recommend to put the cords in boiling hot water for a few minutes.

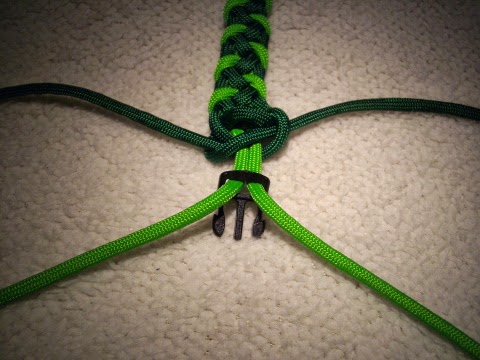
This time I've started with a common Cow Hitch and the second cord through it, because it's a very slim weave.

Use the right inner cord to form a loop around the right outer cord, first behind then over it.

Use the left inner cord and cross it with the right inner cord.
The cord from the loop is always underneath.

Use the outer right cord and pull it between the lower cross, first over then underneath it.

Pull the end from the right outer cord through the loop, from the backside.

Pull the cord all the way through the loop.

Step 07:
Tighten the loop and knots firmly to get a result as shown in the picture.
Tighten the loop and knots firmly to get a result as shown in the picture.

Repeat the procedure on the left side, by forming a loop with the inner left cord around the outer left cord.

Cross the inner left cord with the inner right cord.
Make sure that the cord from the loop is always underneath.

Pull the outer left cord through the cross, first over then under it.

Pull the outer left end through the loop.

Pull the cord all the way through the loop.

Tighten the loop and knots firmly to get a result as shown in the picture.

Repeat Step 02 - Step 13 to continue the pattern until you reached the desired bracelet length.
Don't forget to calculate the finish and the buckle for the length.
Don't forget to calculate the finish and the buckle for the length.

To finish the bracelet, use the outer cords to form an Overhead Knot around the remaining inner cords.

Form a second Overhead Knot.
But don't tighten them, because you need them for the finish.
Pull the remaining inner cords through the frontside of the buckle...

...then tighten the Overhand Knots firmly.

Step 18:
Cut and singe the ends.
You can use a thimble to give it a small pattern.
Cut and singe the ends.
You can use a thimble to give it a small pattern.

Sometimes it looks good to paint the singed ends, I've used a common cd-marker for that.


No comments:
Post a Comment
Note: Only a member of this blog may post a comment.